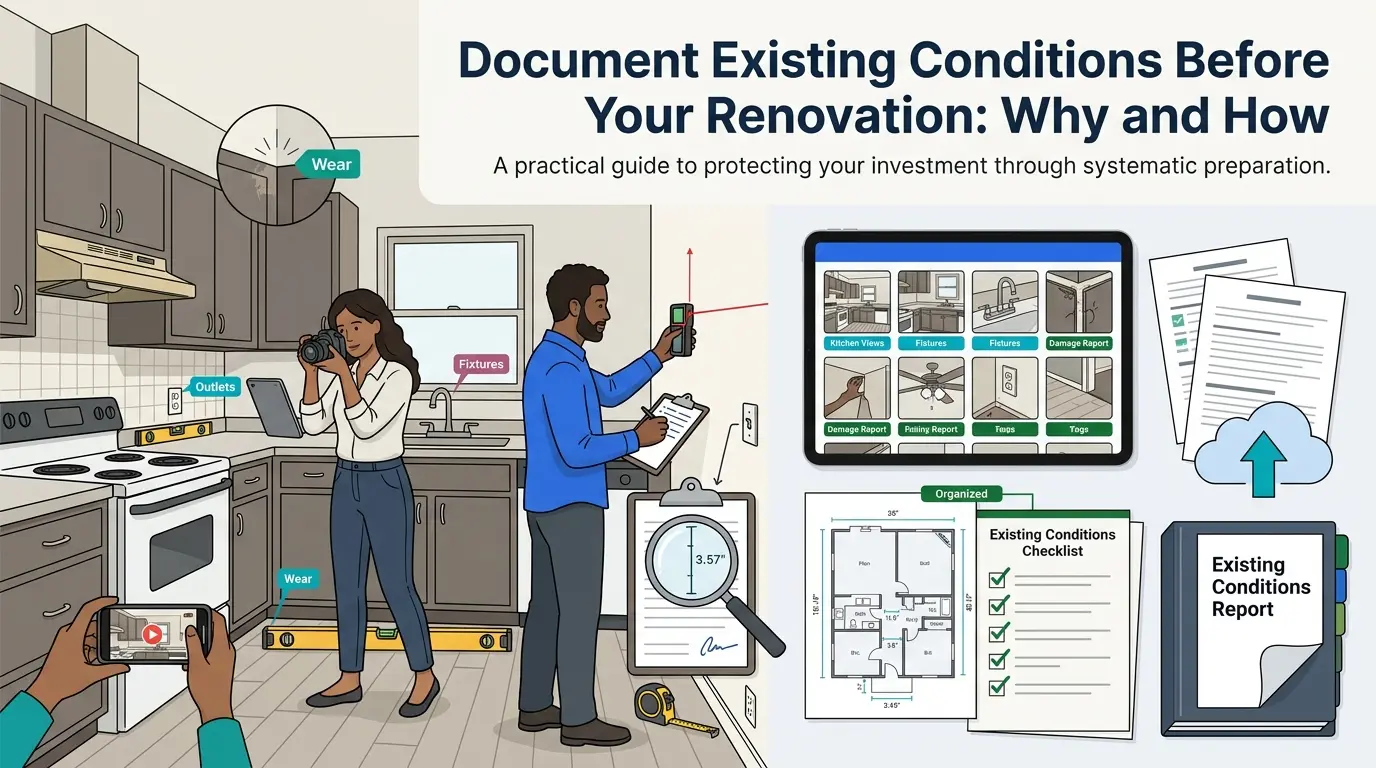
Document Existing Conditions Before Your Renovation, Why and How
Your contractor mentions it almost in passing during the first walkthrough: "We should document existing conditions before we start." You nod, then think about it for a second and go, wait, why? We're about to tear this room apart. What's the point of documenting something that's going away in two weeks?
Here's the point, and it's a genuinely good one: documenting existing conditions isn't about preserving what you're demolishing. It's about protecting yourself, your contractor, and your budget from the arguments and surprises that show up the moment walls actually come open. It's a small step that takes an afternoon, and it's one of the more overlooked pieces of renovation prep, right up until the moment something unexpected turns up mid-project and nobody can agree on whether it was already there.
The short version: documenting existing conditions means creating a clear record, photos, measurements, and notes, of exactly what your space looks like right before work begins. It protects you from paying for pre-existing problems as if they were caused by the renovation, protects your contractor from being blamed for damage they didn't cause, and gives your designer or architect an accurate baseline to plan around. It can be done yourself for next to nothing, or professionally for roughly $800–$2,500 depending on scope. Here's why it matters and how to actually do it.
Why Document Existing Conditions?
Construction surprises are genuinely common. Open up a wall and you find things, old wiring nobody updated, framing with water damage from a leak years ago, plumbing routed somewhere unexpected. None of this is unusual. What matters is whether you have a record of what things looked like before the wall came open, so when something surprising turns up, you can tell whether it was there all along or happened during the work.
It protects your insurance position. Homeowner's insurance generally treats existing damage differently than damage that occurs during construction. If something looks questionable partway through a project, documentation showing the pre-existing condition is the difference between a straightforward insurance conversation and a messy one.
It protects your contractor, too, not just you. If a contractor is accused of causing damage they didn't cause, existing conditions documentation is exactly what clears that up. This isn't a one-sided protection; a good contractor often welcomes this step because it protects them from unfair blame just as much as it protects you from unfair charges.
It heads off unnecessary change orders. Mid-renovation discoveries, mold, rot, unexpected wiring, often come with a change order attached, sometimes running into thousands of dollars. Whether that discovery was pre-existing or something that happened during the work makes a real difference in who's responsible for the cost. Documentation is what actually answers that question instead of leaving it as a disagreement.
It gives you a genuine before-and-after record. Beyond the practical protection, having clear documentation of what the space looked like before makes the finished result land harder, and it's useful for insurance records, and for showing the quality of the work if you sell down the line.
It's real evidence if a dispute happens. If a disagreement with a contractor, a neighbor, or a future buyer ever needs sorting out, a documented "before" state is concrete, dated proof of what existed, far more useful than everyone's memory of what things looked like.
It helps you plan for the unexpected before it's expensive to fix. A documented look at existing structure, systems, and materials, done properly, ideally with someone who knows what to look for, sometimes catches a problem before demolition even starts, when it's still cheap and easy to plan around rather than an expensive mid-project surprise.
A concrete example: a kitchen renovation starts, the contractor opens the wall for new electrical, and finds a plumbing configuration nobody expected, meaning a more involved (and more expensive) reroute than planned. Without documentation, that becomes a conversation about who should have known and who's paying for it. With documentation showing the existing plumbing layout, the answer's already clear, the contractor plans around it, and nobody's arguing about blame.
What "Existing Conditions" Actually Means
Existing conditions documentation is simply an accurate record of your property's current state, right before renovation work begins.
It includes: the physical structure (walls, floors, ceilings, roof), the materials already in place (siding type, flooring, finishes), existing systems (electrical, plumbing, HVAC, gas), any visible damage or wear (cracks, stains, deterioration), functional problems (a door that sticks, a window that doesn't open properly), anything that looks like a code issue, where utilities currently run, any built-ins or fixtures that will be removed or modified, and how the renovation area connects to the rest of the house.
It doesn't include what you're planning to do, that's the design and the contract scope, a separate document entirely. Existing conditions documentation is purely a snapshot of "before," meant to be the reference point you compare "after" against.
What Should You Actually Document?
Visual documentation:
Wide shots of the entire space, from multiple angles Close-up photos of any visible damage, wear, or existing issues Photos of systems, electrical panel, water heater, HVAC equipment Photos showing where utilities enter the space Photos of how existing systems and connections are configured Photos of materials, siding, roofing, flooring, finishes Photos of built-ins or fixtures that will be removed or modified Photos of adjacent areas, showing how the renovation space connects to the rest of the house
Measured documentation:
Room and space dimensions Ceiling and wall heights Doorway dimensions Window locations and sizes Utility locations (electrical panel, water heater, and so on) Structural features, beams, posts, anything that might be load-bearing Wall thickness
Written documentation:
Notes on materials, what walls, floors, and finishes are actually made of Any existing damage, cracks, water stains, signs of rot Functional issues, what doesn't work or operate correctly Notes on utility age, condition, and apparent capacity Anything that looks like a code compliance issue Recent maintenance history or known problems, if you're aware of any
Additional detail worth capturing for renovation planning specifically: which walls appear load-bearing, whether the electrical panel has capacity for additional circuits, how accessible existing plumbing is, whether mechanical systems can realistically be relocated, and which finishes and materials you're keeping versus replacing.
When to Document, Timing Matters More Than People Think
The best window is right before renovation actually starts, days to a couple of weeks out, not months in advance. Conditions can genuinely shift in the meantime (a small leak gets worse, for instance), so documenting close to the actual start date gives you the most accurate baseline.
That said, existing conditions documentation shows up at a few different points in a typical renovation timeline:
Before design begins. A designer or architect genuinely benefits from seeing existing conditions before finalizing a design, it helps them plan around real constraints (a load-bearing wall, an awkward utility location) rather than discovering them later and having to redesign around a surprise.
Before permitting. In some cases, existing conditions documentation feeds directly into the drawings submitted with a permit application, giving the plan checker a clear before-and-after picture of the scope.
Before construction, the most common point. A final walkthrough and documentation session right before the contractor starts demolition is the most typical timing, and ideally happens with the contractor present so everyone's looking at and acknowledging the same starting conditions.
Why not earlier than that: conditions can change between an early documentation session and the actual start of work, better to have your baseline reflect reality as close to day one as possible.
Why not later: once demolition starts, you've lost your chance. If something gets discovered mid-project that you wish you'd documented beforehand, there's no going back to capture what it looked like before work began.
DIY vs. Professional Documentation
| DIY | Professional | |
|---|---|---|
| Typical cost | Minimal, maybe $0–$200 for supplies | $800–$2,500, depending on scope |
| Tools | Phone camera, tape measure, notebook | Professional camera, laser measure, systematic process |
| Accuracy | Reasonable for general reference | High, measured, systematic, thorough |
| Time required | A few hours of your own time | Scheduled visit, typically handled for you |
| Credibility in a dispute | Limited | Strong, professional, organized documentation |
Professional documentation is worth it when: the project is more complex, you want documentation with real credibility if an insurance or contractor dispute arises, or you'd simply rather have someone who knows exactly what to look for handle it systematically rather than risk missing something important.
A middle-ground option exists too: you handle the photography yourself, and a professional measures the space and produces clean documentation or drawings from those measurements, often landing around $500–$1,500, a reasonable compromise between full DIY and full professional service.
What Professional Documentation Actually Involves
Scheduling and scope. You describe the project and any specific concerns, and the professional schedules a visit, typically with just a day or two of notice needed.
Pre-visit planning. The professional confirms which areas matter most, the renovation zone specifically, plus any adjacent spaces or systems worth capturing for context.
The documentation visit itself. Systematic photography of each space (wide shots and close-ups), any visible damage or issues, systems and utility locations, and how the renovation area connects to the rest of the house, paired with actual measurements of dimensions, openings, and structural features, plus written notes on materials, damage, and functional issues.
Organization. Photos and measurements get organized by area and clearly labeled, so the final documentation is something you can actually navigate later rather than a folder of 400 unsorted images.
Deliverables, depending on scope:
- Photos plus written notes, a straightforward, organized documentation set, typically in the $800–$1,200 range, suitable for general reference and insurance purposes. - Photos, measurements, and a basic existing-conditions drawing, typically $1,200–$1,800, useful as a direct reference for your contractor and renovation planning. - Full existing conditions documentation, photos, measurements, and a complete drawing set, typically $1,500–$2,500, appropriate for more complex renovations or anywhere legal and insurance protection genuinely matter.
How to Actually Use This Documentation
During design. Your architect or designer uses it to understand real constraints, what's load-bearing, where utilities currently sit, what can realistically be opened up, and to explain to you why certain design choices make sense given what's actually there.
During permitting. Existing conditions documentation sometimes directly supports the drawings submitted with a permit application, giving the reviewing planner a clear picture of what's changing.
When selecting a contractor. Sharing this documentation with contractors you're getting bids from tends to produce more accurate estimates, they're bidding against a clear picture of reality rather than guessing at what's behind the walls.
At the pre-construction walkthrough. Reviewing existing conditions with your contractor before work starts, walking through what exists and what's about to change, gives both of you a shared, acknowledged starting point, including any pre-existing damage or issues.
During the renovation itself. If something unexpected turns up, the documentation is the reference point: was this already there, or did it happen during the work? That single question, answered clearly, prevents a lot of otherwise avoidable disputes.
During change order conversations. A discovery mid-project that comes with a proposed change order is a lot easier to evaluate fairly when you can check whether it was already documented as an existing condition.
At final walkthrough. Comparing the finished work against your existing conditions documentation helps confirm everything was completed as intended.
After the renovation. Keep the documentation on file, it supports insurance records, gives you a genuine before-and-after story, and becomes a useful baseline if you ever tackle another project in the same space down the line.
Existing Conditions Documentation by Renovation Type
Kitchen renovation: document appliances, cabinets, finishes, utility locations, and any visible damage. Kitchens involve a lot of overlapping systems, so plumbing access and electrical capacity are particularly worth capturing clearly before work starts.
Bathroom renovation: document fixtures, tile, plumbing, ventilation, and any signs of water damage. Bathrooms are prone to hidden moisture issues, documentation is particularly valuable here for catching problems early rather than discovering them mid-demolition.
Addition: document the existing exterior, roof condition, wall conditions, and utility locations at the connection point. An addition has to tie cleanly into what's already there, so documenting how the existing structure meets the new work matters more than in a purely interior renovation.
Garage conversion: document the existing structure, door opening, utility access, and ceiling height. Conversions typically require adding utilities and modifying structure, so documenting what's currently available (or missing) shapes the design significantly.
Basement finishing: document existing moisture conditions, ceiling height, and utility access closely. Basements are the space most likely to have hidden water issues, documenting this clearly before finishing work begins can save you from finishing over a problem that needed addressing first.
Structural changes: document load-bearing walls and existing structural framing carefully. This is the category where your architect's understanding of what's actually there, not just what plans from years ago claimed, matters most.
Insurance and Liability Considerations
Homeowner's insurance generally treats pre-existing damage differently than damage that occurs during construction, which makes documentation genuinely useful if a claim question ever comes up. A clear "before" record shows what was already present, keeping you from being on the hook for something that predates the renovation.
The same logic protects your contractor from being unfairly blamed for pre-existing conditions they didn't cause, this is a two-way protection, not just a homeowner safeguard.
If a change order comes up mid-project, "we found water damage," for instance, documentation is what actually settles whether that was there beforehand or occurred during the work, rather than leaving it as a disagreement to hash out after the fact.
And if a dispute genuinely escalates after the renovation is complete, professionally organized documentation carries real weight as evidence of the property's condition before work began.
Weighing the Cost
| Typical Cost | |
|---|---|
| Professional documentation (simple project) | $800–$1,200 |
| Professional documentation (moderate project) | $1,200–$1,800 |
| Professional documentation (complex project) | $1,500–$2,500 |
| Mold discovery mid-project (change order) | $2,000–$5,000 |
| Water damage or rot discovery | $2,000–$10,000 |
| Unexpected structural issue | $3,000–$15,000 |
| Hidden or unexpected utility routing | $1,000–$5,000 |
Common Mistakes to Avoid
Skipping documentation entirely. The most common mistake, and the one that leaves you with no leg to stand on if a dispute or surprise comes up later.
Photos with no measurements. Photos alone tell you what something looks like, not its actual dimensions, not detailed enough for a contractor or designer to plan precisely around.
Poor-quality photos. Bad lighting, blurry shots, or angles that don't actually show the issue clearly defeat the purpose. A few extra minutes with good lighting and multiple angles makes a real difference.
No written notes to go with the photos. A photo of a stain doesn't tell you whether it's old or recent, structural or cosmetic, a short written note attached to each notable photo adds context that the image alone can't.
Documenting too far in advance. Conditions change. Documenting weeks or months before work actually starts risks capturing a state that's no longer accurate by the time demolition begins.
Not sharing it with your contractor. Documentation that only you have doesn't protect anyone during the actual work, walk through it with your contractor before they start, so everyone's working from the same acknowledged baseline.
Only photographing problem areas. Without a baseline of the normal, unremarkable parts of the space too, you lose the ability to compare "before" and "after" comprehensively.
No organization. A phone full of unlabeled photos is nearly useless months later when you actually need to reference something specific, organize by room or area as you go, not after the fact.
Existing Conditions vs. As-Built Drawings
These two are easy to mix up, but they sit at opposite ends of the same project.
Existing conditions documentation happens before renovation, a record of what's currently there, used to plan the work and protect against disputes during construction.
As-built drawings happen after construction, a record of what was actually built, used for future reference, renovation planning down the line, or supporting a future sale.
The natural sequence: document existing conditions before you start, renovate, then get as-built drawings once the work is complete. Together, they give you a genuine before-and-after record of the whole project, and both are worth having, for related but distinct reasons.
Common Questions About Documenting Existing Conditions
Why should I document existing conditions before renovating? It protects you from paying for pre-existing problems as if the renovation caused them, protects your contractor from unfair blame, and gives your designer an accurate baseline to plan around.
What's the best way to document existing conditions? A combination of photos, measurements, and written notes, covering the whole space, not just visible problem areas, done as close to the actual start of construction as possible.
Do I need professional documentation, or can I do it myself? DIY documentation is genuinely fine for simpler renovations on a tight budget. Professional documentation is worth the cost for more complex projects, or anywhere insurance or legal protection genuinely matters.
How much does professional documentation cost? Typically $800–$2,500, depending on scope, photos and notes alone at the lower end, a full measured drawing set at the higher end.
When should I document existing conditions? As close to the actual start of construction as practical, ideally within days to a couple of weeks before demolition begins, not months in advance.
What if I already started my renovation without documenting first? Document what you can right now, before further demolition happens, some protection captured late is still better than none, though you've lost the chance to record what's already been torn out or covered.
Can I use this documentation for an insurance claim? Yes, professionally organized documentation in particular can support an insurance conversation by clearly establishing what existed before the renovation began.
How is this different from as-built drawings? Existing conditions documentation happens before renovation to establish a baseline; as-built drawings happen after construction to document the finished result. They serve related but distinct purposes at opposite ends of the project.
What if the documentation reveals a problem before I even start? That's actually one of the best possible outcomes, catching an issue (structural, moisture, capacity) before demolition begins is far cheaper and easier to plan around than discovering it mid-project.
How should I organize my documentation? By room or area, with clear labels and, ideally, a simple index, the goal is being able to find a specific photo or measurement quickly months later, not just having captured it in the first place.
---
Documenting existing conditions isn't about mourning what you're about to tear out, it's a small, practical step that protects your budget, your relationship with your contractor, and your peace of mind through a process that almost always turns up at least one surprise along the way. It costs an afternoon if you do it yourself, or a modest fee if you'd rather have it done professionally and thoroughly.
Cadtri creates organized, professional existing conditions documentation, photos, measurements, and clear reference materials, to set your renovation up cleanly before the first wall comes down. If you're getting ready to start a project and want that baseline handled right, it's worth having in place before your contractor's first day on site.
---
Related reading: [What Are As-Built Drawings?] · As-Built vs. Record Drawings vs. Survey · How to Plan a Renovation · [Working with Contractors] · Permit Drawing Services · Existing Conditions Documentation Services