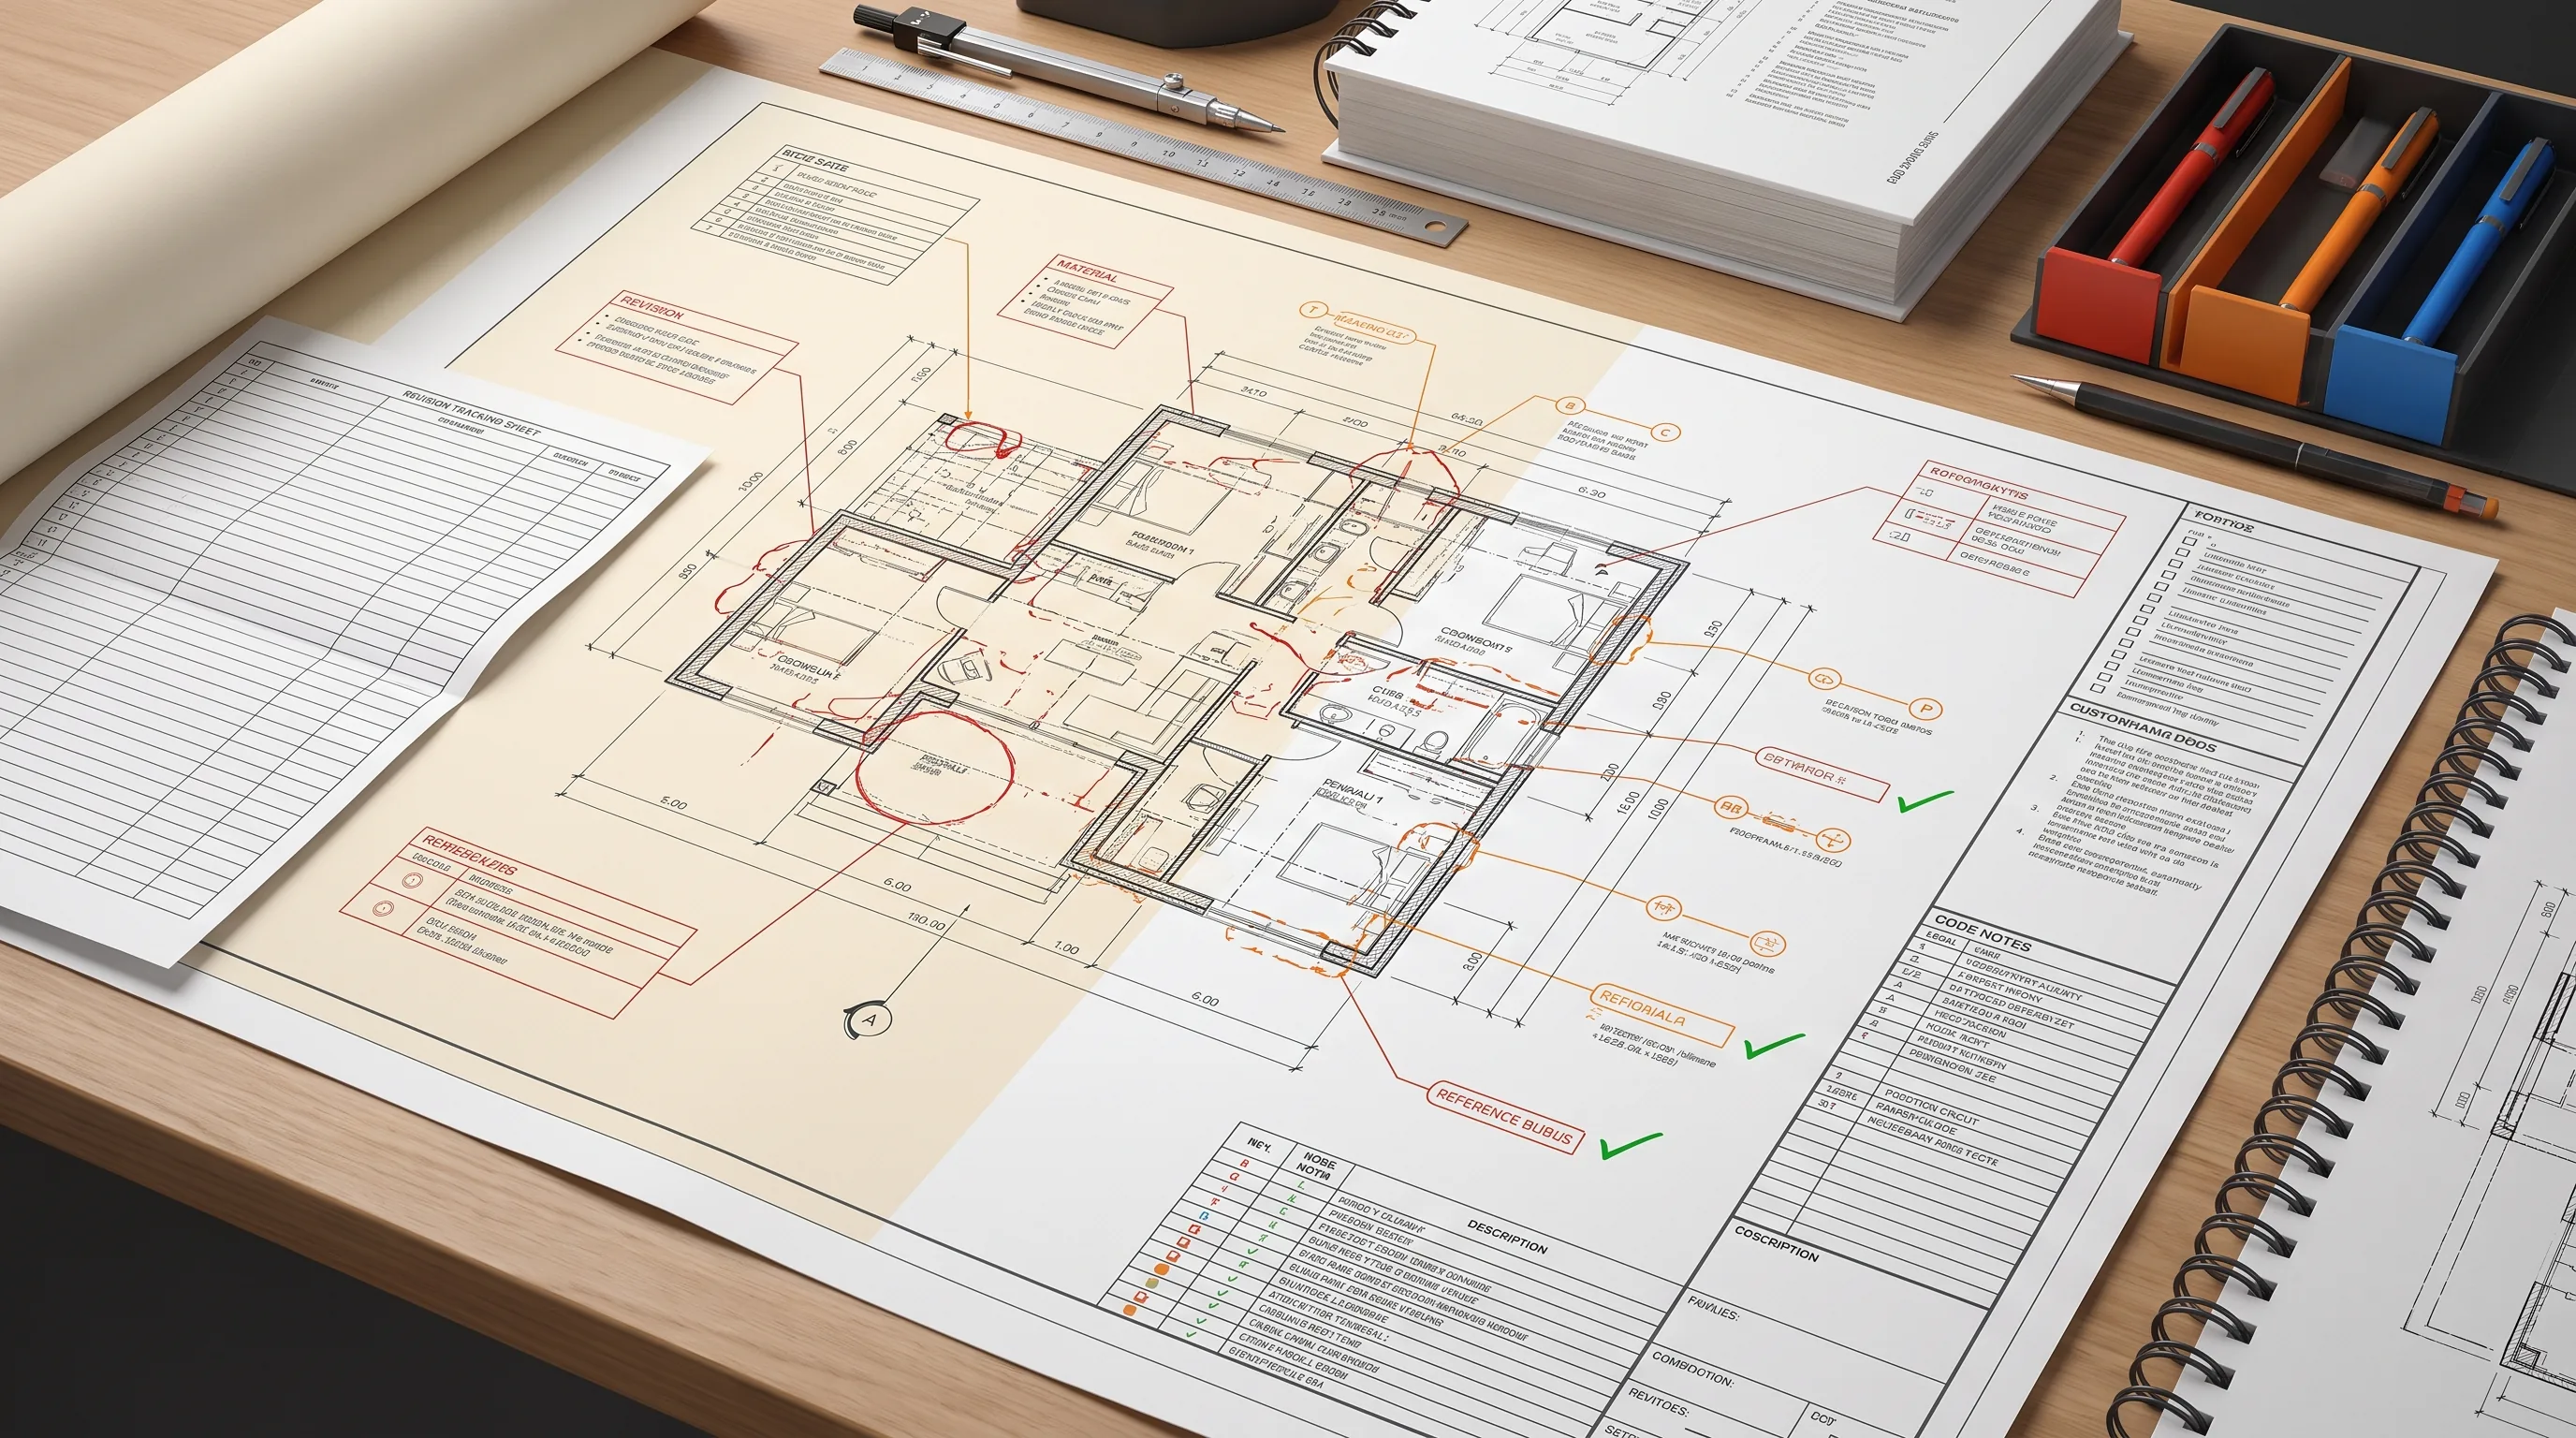
You've got your corrected drawings back. Every issue from the corrections letter has been addressed. Now what? Do you just resubmit the whole set and hope the plan checker notices what's different? Do you highlight the changes yourself? Is there an actual standard here, or does everyone just wing it?
There's a real standard, and it matters more than it looks like it should. Marking up a resubmittal means clearly showing the plan checker exactly what changed in response to their corrections, using a consistent visual system rather than making them hunt for differences between two versions of a drawing. The professional method: draw a revision cloud, a puffy, cloud-shaped outline, around every changed element, number each cloud to match the corresponding correction item, and pair the whole thing with a response letter that explains each change and points to exactly where it's shown. Here's exactly how to do that properly.
Why marking up matters
When you resubmit corrected drawings, clear markup shows the plan checker precisely what changed without forcing them to manually compare your new set against the old one line by line. That's not just a courtesy, it directly affects how fast your resubmittal gets reviewed. A reviewer who can see immediately what changed, confirm it addresses the correction, and move on gets through your file faster than one who has to reconstruct what's different from scratch.
There's a credibility angle too. A cleanly marked-up resubmittal signals that whoever prepared it knows the professional standard, which tends to earn a bit more benefit of the doubt on ambiguous items. A resubmittal with no markup at all, or markup that's inconsistent and confusing, signals the opposite, even if the underlying design changes are perfectly fine.
What "marking up" actually means
Marking up a resubmittal means indicating, directly on the drawings, which specific elements were changed, added, or removed in response to each correction. Professional resubmittals typically combine several methods rather than relying on just one: revision clouds circling the changed areas, numbered or lettered revision marks tying each cloud to a specific correction, an updated revision table on the title block, and a written response letter tying everything together. Below is an example showing how this actually looks across two related sheets.
The revision cloud: the professional standard
A revision cloud is a cloud-shaped outline drawn around a changed element to flag it clearly without altering or obscuring the underlying drawing. It's the standard method across architecture and drafting firms, for good reason: it stands out visually, it doesn't overwrite or clutter the original content, it scales cleanly from a small dimension change to a large redesigned area, and every CAD program has a built-in tool for it (in AutoCAD, under Revise; in Revit, under Annotation, other CAD software has an equivalent).
To use one: go through each correction and identify exactly what changed, which sheet shows it, and how large the affected area is. Then, on the revised sheet, draw a revision cloud around that specific element using your CAD software's cloud tool. Add a number or letter inside or next to the cloud that corresponds directly to the correction item it addresses, if correction #3 was "enlarge egress window," the cloud around that window gets labeled "3." Finally, reference that mark in your response letter: "Item #3: egress window enlarged to 5.7 sq ft. See Revision Cloud 3, Sheet F1.0."
The detail that trips people up most: a revision cloud needs to appear on every sheet where that element shows up, not just the one sheet where the change is most obvious. Enlarging a window might affect the floor plan (location and new dimensions), the elevation (how it looks from outside), a detail sheet (the assembly itself), and the window schedule (updated specifications), all four need the same numbered revision cloud, or the plan checker has no way of confirming the change was actually coordinated everywhere it needed to be.
Redlines: an alternative worth understanding
Redlines are colored lines, traditionally red, though any color works, overlaid directly on a drawing to show additions, deletions, or changes: a strikethrough on something being removed, a new line in a distinct color for something being added, colored highlighting over a modified area.
Redlines show exactly what was deleted versus added in a way revision clouds alone don't, which is genuinely useful when you're directly hand-marking a printed sheet rather than redrawing in CAD. The tradeoff: they clutter a drawing fast if there are many small changes, and they're generally considered less polished than clean revision clouds as the primary method. Best practice, when you do use them, is pairing redlines with a revision cloud around the same area, the redline shows exactly what changed, the cloud circles and numbers the whole affected zone for easy reference.
Revision numbering systems
Numbers matching the corrections letter, correction item #1 becomes revision mark "1," item #2 becomes "2," and so on. This is the clearest, most directly traceable system, and it's the one to default to.
Letters instead of numbers, sometimes preferred because they're visually distinct from dimension numbers already on the drawing, reducing any chance of confusion. This works fine up to about 26 changes, after which you'd need a different convention.
Descriptive text instead of a number or letter, writing "egress window enlarged" directly next to the cloud instead of a number. This is immediately clear without cross-referencing anything else, but it clutters a drawing quickly if you have more than a handful of changes.
Best practice: use a number or letter system that matches your corrections letter directly, and save the descriptive detail for your response letter rather than the drawing itself.
What to mark up, and what not to
Mark: dimension changes, added elements, deleted elements, relocated elements, material specification changes, revised notes, and anything that had to be updated across multiple sheets because of a single underlying change.
Don't mark: anything that didn't actually change. No clouds on grid lines or title blocks unless they themselves changed. No clouds on minor formatting adjustments that don't reflect a substantive response to a correction. Marking things that didn't change defeats the entire purpose, it makes real changes harder to spot, not easier.
Coordinating marks across sheets
This is the part that separates a genuinely professional resubmittal from a sloppy one. Take the egress window example again: enlarging it affects the floor plan, the elevation, a detail sheet, and the window schedule, four sheets, one underlying change. Every one of those four sheets needs a revision cloud labeled with the same number, "3" in this case, so the plan checker can see at a glance that the change was carried through consistently everywhere it needed to be.
If you only mark the floor plan and leave the elevation, detail, and schedule unmarked, the plan checker has no easy way to confirm those other sheets were actually updated to match, and that ambiguity is exactly the kind of thing that generates a follow-up question or another round of corrections, even when the underlying work was actually done correctly.
Revision tables: the systematic record
Many drawing sets include a revision table directly on the title block, tracking every change over time:
| Rev | Date | Description | Approved |
|---|---|---|---|
| 1 | 5/20/24 | Enlarged egress window per plan check comments | JD |
| 2 | 5/21/24 | Verified setback compliance | JD |
| 3 | 5/22/24 | Added energy code documentation | JD |
For a resubmittal specifically, update this table to reflect the new revision, the date, and a brief description of what changed. This is a small, easy step that reinforces the same information your revision clouds and response letter are already communicating, and it shows the plan checker a clear, dated history of the drawing's evolution.
The response letter: the essential written complement
Never resubmit drawings with revision clouds alone and no written explanation. A response letter is what ties everything together, and it should follow a simple, professional structure:
[Your name/company], [date]. [Plan checker name], [building department]. RE: [project name], [permit number], resubmittal response.
Dear [plan checker name]: Please find attached the revised drawings responding to the plan check comments dated [date].
Item #1: Egress window enlarged from 4.0 sq ft to 5.7 sq ft to meet code minimum. Window sill height reduced to 42" above floor. See Revision Cloud 1, Sheets F1.0 (floor plan), E1.0 (elevation), and D2.1 (detail).
Item #2: Setback verified and documented. North setback is 28 feet (25 feet required). See Revision Cloud 2, Sheet S1.0 (site plan). Calculation shown in the code analysis sheet.
Item #3: Ceiling height verified at 8'0" throughout habitable spaces. See Revision Cloud 3, Sheet S2.1 (section).
All comments have been addressed. Please let me know if you need any additional information.
Sincerely, [your name]
The key elements: a clear summary of each revision, an explicit reference back to the correction item number, the specific location of the revision mark on the drawings, and a professional, straightforward tone throughout.
The practical workflow, step by step
- Receive the corrected drawings from your drafter or architect, addressing every item on the corrections letter.
- Review each correction line by line, confirming exactly what changed for each item.
- Identify every sheet affected by each change, remembering that most changes touch more than one sheet.
- Add revision clouds in your CAD software, on every affected sheet, numbered to match the correction items.
- Update the title block's revision table with the new revision number, date, and a brief description.
- Prepare the response letter, mapping each correction item to what changed and where to find it.
- Assemble the complete resubmittal package: the full revised drawing set (not just the changed sheets), the response letter, any new supporting documents like calculations or compliance reports, a copy of the original corrections letter, and the resubmittal fee if your jurisdiction charges one.
- Submit, whether that's in person, by mail, or through an online permit portal if your city offers one.
Common mistakes in marking up
| Mistake | What goes wrong | Fix |
|---|---|---|
| Marking only one sheet | Plan checker can't confirm the change was coordinated elsewhere | Mark every sheet where the element appears |
| Unclear or missing numbering | No way to tell which cloud matches which correction | Use a consistent number/letter system matching the corrections letter |
| No response letter | Plan checker has to reconstruct what changed without explanation | Always include a letter mapping each item to its fix |
| Overly aggressive markup | Cluttered, hard-to-read drawings | Use clean revision clouds instead of heavy redlines everywhere |
| Incomplete package | Missing letter or supporting documents, submission bounced | Use a checklist before submitting |
| Submitting only changed sheets | Department can't verify coordination across the full set | Always resubmit the complete drawing set |
Digital vs. print markup
Digital markup, using your CAD software's built-in revision cloud tool, is the professional standard: clean, easy to coordinate consistently across sheets, simple to version-track, and printable if a physical copy is ever needed. This is what to default to whenever you have access to the original CAD files.
Print markup, printing the drawings and marking changes by hand with a red pen, then scanning the result, works in a pinch if CAD access isn't available, but it looks noticeably less polished, is much harder to coordinate consistently across multiple sheets, and often suffers from poor scan quality. Use it only when digital markup genuinely isn't an option.
When your building department requests specific markup
Some jurisdictions have their own explicit preferences. "Submit with revision clouds clearly marked" means exactly what it says, standard CAD revision clouds. "Show all changes in red" means using red specifically, an older-school convention some departments still prefer. "Provide marked-up and clean versions" means submitting two copies: one showing the revision marks, one without them. "Include a revision table on the title block" means adding the formal table described above. "Highlight changes in yellow" means exactly that.
The best practice here is simple: ask your building department directly whether they have specific markup requirements before you prepare your resubmittal, and follow their guidance exactly rather than assuming the general standard applies.
Tools for marking up
CAD-based tools are the professional default, AutoCAD's revision cloud tool under the Revise menu, Revit's under Annotation, and equivalent tools in MicroStation, LibreCAD, and most other CAD platforms. PDF-based markup tools like Bluebeam are an industry standard specifically for coordinating markup and comments across a team, and Adobe Acrobat's annotation tools can work in a pinch, though they're less tailored to CAD-native drawings. Hand markup, printing and marking by pen, remains workable when nothing else is available, but it's the least professional option on this list.
FAQ
What's a revision cloud?
A cloud-shaped outline drawn around a changed element on a drawing, used to flag exactly what was added, revised, or modified in response to a correction, the standard visual method across the drafting and architecture industry.
Do I have to use revision clouds?
Not universally required by every building department, but it's the expected professional standard, and using them makes your resubmittal significantly easier and faster for a plan checker to review.
Can I use redlines instead of revision clouds?
Yes, particularly for hand-marked printed sheets, but revision clouds are the cleaner, more standard method for digital CAD work, and combining both (redlines showing exactly what changed, clouds circling and numbering the area) is often the strongest approach.
What if I have more than 26 changes?
Switch from a letter-based system to numbers, which don't run out, or use a two-part numbering convention (like "1a," "1b") if changes cluster around related corrections.
Do I resubmit the whole set or just the changed sheets?
The whole set, always. Building departments need the complete drawing package to verify coordination across every sheet, not just the ones that changed.
Should I include a response letter?
Yes, every time. Revision clouds show what changed visually; the response letter explains it in writing and ties each change directly back to the correction item it addresses.
What if the plan checker didn't ask for a specific markup format?
Default to the professional standard: revision clouds, numbered to match your corrections letter, plus a response letter. This satisfies the large majority of building departments even without an explicit request.
Can I mark up by hand?
Yes, if CAD access isn't available, though it's the least polished option and harder to coordinate consistently across multiple sheets. Digital markup in CAD is the stronger default whenever it's possible.
Getting it right
A well-marked-up resubmittal isn't about decoration, it's about making your plan checker's job as fast and unambiguous as possible, which directly benefits your own timeline. Revision clouds, consistent numbering carried across every affected sheet, an updated revision table, and a clear response letter together tell the reviewer exactly what changed, why, and where to verify it.
If you want your resubmittal package prepared and marked up properly the first time, coordinated revision clouds, a complete response letter, everything cross-referenced correctly, that's part of how we handle corrections for our clients. Start with permit drawing services, or see Plan Check Corrections: How to Respond and Get Approved Faster for the fuller resubmittal process this fits into.